
This post’s contents have moved to here (Unix, Linux and Mac OS X Notes).
Author Archives: apomeroy
One of those days .. where’s Batman?
Thanks Rachel (Maui Tattoo) and Amanda, this is perfect for today’s theme …

From:
http://digg.com/pets_animals/I_hope_to_god_that_s_batman_Pic?t=26320410
IMAP mailstore migration .. again
So last weekend, I discovered that Spamhaus decided it would be a good idea to place all of the public IP addresses for Slicehost (my Linux VPS hoster) into their Spamhaus block list (SBL). This covered both my slice in Dallas and the one in St. Louis – meaning an impressive chunk of inbound mail to my domains was being trashed by the sending MTA and an even bigger chunk of my outbound mail was being outright rejected since the sending IP’s were on the SBL. Slicehost worked hard to convince Spamhaus to recind the blocklist, so the Slicehost IP’s got moved over to the less-nasty-but-you’re-still-probably-a-spamming-dirtbag Policy Block list (PBL) assuming affected IP owners would request to be removed from that list.
Sample query to see if you’re on any Spamhaus block list: http://www.spamhaus.org/query/bl?ip=10.11.12.13
It seems it’s time to relinquish the care and feeding of my own Postfix mail system and turn to a hosted solution. This means I need to migrate about 5GB of IMAP store to another site (again). Last time I did a wholesale migration, I used imapsync to make the transition painless. In the code example below, an SSL connection to the IMAPS server at imap-server.sourcedomain.com is made with username@sourcedomain.com and the password stored in the plaintext file secret1. An SSL connection is made to the target system (which happens to be the server on which the imapsync tool is running, but could just as easily be another IMAPS server somewhere on a network accessible to the host where imapsync is running). The –delete and –expunge1 arguments will clean the successfully moved messages from IMAP store #1 .. so be sure you have your messages on the target successfully! Imapsync can be run iteratively to ensure you have got all the messages from your source.
/usr/bin/imapsync \

--host1 imap-server.sourcedomain.com \

--ssl1 \

--authmech1 LOGIN \

--user1 username@sourcedomain.com --passfile1 secret1 \

--host2 127.0.0.1 --user2 username@targetdomain.com --passfile2 secret2 \

--ssl2 \

--delete --expunge1 \

--buffersize=128
And one can use the
--dry
option to just test the process but not actually move any of the messages.
So that’s it – I’m about half way though migrating my current IMAP stores over to a hosted mail solution, so that I don’t need to keep up with the increasing level of care and feeding that running your own mail service requires. Before I get too many darts about that .. I first started running my own personal MTA in 1995, adding spam and av filtering over time, and adding substantial redundancy (servers, sites, storage) so I could rely on it and fix things that broke as I had time rather than right when they broke (which was always at a bad time). My new hosted solution takes over from two VPS servers running Postfix, Spamassassin, ClamAV, Greylisting with the IMAP store replicated across data centers in different states (15 minute rsyncs). So soon, the (hopefully) last Allen Pomeroy owned and operated MTA can be turned off, while I get to work on fun stuff, rather than figuring out why my email is bouncing. 🙂
Update 2012/12/17:
Sometimes manual manipulation of your mailstore via IMAP is needed, so here’s how I deleted a large number of folders I had trashed and were being synced to my new system from the old. Kinda clunky, since I didn’t get the scripted version to work (just used a copy/paste in an interactive bash session), but got the job done for now.
Connect to the IMAP server using SSL:
openssl s_client -crlf -connect imap.emailsrvr.com:993
* OK [CAPABILITY IMAP4rev1 LITERAL+ SASL-IR LOGIN-REFERRALS ID ENABLE IDLE AUTH=PLAIN] Server ready director6.mail.ord1a.rsapps.net
Log in with your email credentials:
0 login user@domain.com Password
0 OK [CAPABILITY IMAP4rev1 LITERAL+ SASL-IR LOGIN-REFERRALS ID ENABLE IDLE SORT SORT=DISPLAY THREAD=REFERENCES THREAD=REFS MULTIAPPEND UNSELECT CHILDREN NAMESPACE UIDPLUS LIST-EXTENDED I18NLEVEL=1 CONDSTORE QRESYNC ESEARCH ESORT SEARCHRES WITHIN CONTEXT=SEARCH LIST-STATUS QUOTA] Logged in
List the folders you want to remove:
0 list "" "Trash.*"
That didn’t return the list I was expecting, so I listed all folders
0 list "" "*"
… and realized the source mail system adds “INBOX” on the front of the folder names, so then this command worked to list the folders to be deleted:
0 list "" "INBOX.Trash.*"
I copied the output and edited it to insert the folder name into a delete command:
0 delete "INBOX.Trash.Folder1"

0 delete "INBOX.Trash.Folder2"

0 delete "INBOX.Trash.Folder3"
0 OK Delete completed.
0 OK Delete completed.
0 OK Delete completed.
Finish off the session by logging out:
0 logout
* BYE Logging out
0 OK Logout completed.
closed
How to secure your home PC
Whether you have a Mac or a Windows PC, there are some basic steps you can take to reduce the risk and personal impact of a malware infection. This advise is especially impactful when you have just purchased a new Mac or Windows system. There are several steps that you can take to protect your new investment and more importantly your information. In the following detail, I mainly focus on Windows as that’s the main technology that my non-IT type friends ask about.
Basically what you should be doing is:
- Ensure that a hardware firewall/router is in between the internet and the PC (I’ll just call it a firewall from now on)
- Use a recognized brand name like Linksys, avoid the no-name generics as they often have bad defaults and don’t implement the stateful-packet-inspection that you want to filter out most of the cruft on the Internet from reaching your PC
- Ensure all default passwords on the firewall and PC have been changed
- When you initially turn on the power to your PC and to your firewall, do NOT have them connected to your cable or DSL modem initially. Do the setup of your firewall and PC first in order to ensure malware doesn’t have a chance to get at your shiny new PC before you’ve turned on the needed protection
- Point a browser to your firewall (likely 192.168.0.1 or 192.168.1.1) and change the default administrator password. This is very important, as some malware will seek out your firewall and try to use the manufacturer default password to change things like your DNS server settings – inserting the bad guys in between you and the rest of the Internet (eg. forcing your traffic to them first before it goes to your bank)
- All normal accounts used for day-to-day business on the computer should NOT have administrator privilege (see my post on running without admin privileges)
- On Windows XP, Vista (and I think 7), the default “user” that accesses the PC has full administrative privilege, that enables software installation and configuration changes. This is very dangerous, as malware that you come in contact with from infected emails or websites use this privilege to install their spyware, keyloggers, backdoors and other nasty stuff on your PC – without your explicit permission
- Set a password for your Administrator account
- Create a new user right away, before you setup your email, music, photos, documents, etc; ensure that new user is NOT a Computer Administrator
- Always login with this non-Administrator username for your day-to-day use; only use the Computer Administrator username for software installation and configuration changes.
- Never surf the Internet with an account that has administrative privilege
- If this is a common PC for a business, ensure employees accounts are individually assigned (if practical). Ensure those employee accounts are not administrators (unless there is a need and a high degree of trust)
- Run a good commercial anti-virus program with annual software support (or a subscription)
- There are some good free AV packages (AVG, Clamwin, Avast) .. Google them for the links
- Sophos makes a good Mac AV package .. yes, Macs are vulnerable to malware as well; it’s just not as prevalent
- Finally ensure regular (daily) backups are being run to protect your business, financial, customer information from loss if there is a problem with the PC
- For setup of your wireless access point (if you have one .. sometimes it’s built into the router/firewall)
- Chose wireless encryption of at least WPA or WPA2 .. never use WEP or no encryption
- There is no significant increase in security by obscuring your network name (SSID)
- Don’t use any personally identifiable information in your network name
If you are unsure of how to do any of these steps, get one of your computer knowledgeable friends to help you. Of course if you are purchasing a new system right now, I’d strongly recommend you check out Apple’s Mac products. They’re not immune to malware, but the architecture and core are by design much less vulnerable to the types of malware that plague Windows.
FreeMind mind mapping tool
Have you ever had a daunting task that just seemed like a nightmare to get your head around how to organize it? If you’re like me, you try to find some patterns in all the individual elements that make up whatever the topic is you’re trying to get a handle on. The patterns may not come easily, and even if they do, it’s usually a pain to try and re-categorize an element as you see fit (ever tried to create lists and categorize things in Excel??).
I came across a tool that one of my clients uses called FreeMind – it’s a Java app that allows you to enter a number of text elements and reorganize them in a hierarchical fashion.
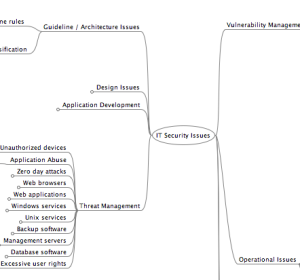
FreeMind example
Ok, one can do that with an unstructured word processor document or a spreadsheet, but FreeMind allows you to dump all these random ideas onto the page then drag and drop into categories or tags that make sense as you’re rearranging the elements.
So after about an hour of dropping in ideas around areas of improvement for the IT security of one of my clients, I had over 250 elements organized into 8 high level categories and about 18 subcategories. It was grouped well enough to lead discussions on what the current priorities for their programmes should be. If I had attempted this in a spreadsheet (and I had) it would have taken hours and untold frustration – not to mention I probably would have missed relationships that I could see in FreeMind.
If I had attempted this in a spreadsheet (and I had) it would have taken hours and untold frustration
FreeMind icons
You can add icons to each element to make labeling and categorization easier. Best to check out the FreeMind home page as it is a feature rich tool. From the project Wiki, typical uses include:
- Keeping track of projects, including subtasks, state of subtasks and time recording
- Project workplace, including links to necessary files, executables, source of information and of course information
- Workplace for internet research using Google and other sources
- Keeping a collection of small or middle sized notes with links on some area which expands as needed. Such a collection of notes is sometimes called knowledge base.
- Essay writing and brainstorming, using colors to show which essays are open, completed, not yet started etc, using size of nodes to indicate size of essays. I don’t have one map for one essay, I have one map for all essays. I move parts of some essays to other when it seems appropriate.
- Keeping a small database of something with structure that is either very dynamic or not known in advance. The main disadvantage of such approach when compared to traditional database applications are poor query possibilities, but I use it that way anyway – contacts, recipes, medical records etc. You learn about the structure from the additional data items you enter. For example, different medical records use different structure and you do not have to analyze all the possible structures before you enter the first medical record.
- Commented internet favorites or bookmarks, with colors and fonts having the meaning you want
What a great tool .. I’m sure I’ll find more uses for it!
Windows/AD Notes
Find all the AD groups a particular user belongs to:
dsquery user -samid username | dsget user -memberof
Find all members of an AD group:
dsquery group -samid groupname | dsget group -members
Find all inactive users:
dsquery user -disabled -inactive 12
Building a web security lab (with VMware Fusion)
Problem: VMware machines load boot loader immediately, no BIOS banner, so can’t get into BIOS to alter boot settings.
Solution: Edit the vm’s .vmx file and add the line:
bios.bootDelay = "5000"
which adds a 5000 millisecond (5 second) delay to the boot, or add:
bios.forceSetupOnce = "TRUE"
to make the VM enter the BIOS setup at the next boot.
Problem: VMware Fusion 3.0 doesn’t give a way to edit the virtual network settings via the GUI.
Solution: To change the subnet used by the NAT or HostOnly networks, go root in Mac OS X and edit
/Library/Application Support/VMware Fusion/networking
and set the following lines to the subnets desired:
answer VNET_1_HOSTONLY_SUBNET 192.168.35.0

answer VNET_8_HOSTONLY_SUBNET 10.10.1.0
To add additional custom isolated host only VLANs, also edit the networking file and add additional VNET definitions. There can apparently only be 8 VLANs with VLAN 1 and 8 already pre-defined.
answer VNET_2_DHCP no

answer VNET_2_HOSTONLY_NETMASK 255.255.255.0

answer VNET_2_HOSTONLY_SUBNET 10.10.21.0

answer VNET_2_VIRTUAL_ADAPTER yes

answer VNET_3_DHCP no

answer VNET_3_HOSTONLY_NETMASK 255.255.255.0

answer VNET_3_HOSTONLY_SUBNET 10.10.22.0

answer VNET_3_VIRTUAL_ADAPTER yes

answer VNET_4_DHCP no

answer VNET_4_HOSTONLY_NETMASK 255.255.255.0

answer VNET_4_HOSTONLY_SUBNET 10.10.23.0

answer VNET_4_VIRTUAL_ADAPTER yes
Now create your vm with as many network interfaces as you have separate VLANs (vnet) then edit the node.vmx vm configuration file and change the interfacename.connectionType to custom, and define the VLAN (vnet) that interface will attach to:
#ethernet0.connectionType = "nat"

ethernet0.connectionType = "custom"

ethernet0.vnet = "vmnet3"
Also realize that VMware will take the .1 host address on each vmnet – so you cannot assign .1 to any of your VMs.
Problem: Ubuntu 9.10 persistent network configuration (stores the MAC address of network adapters), so if you copy a machine, by default Ubuntu will setup a new logical adapter (eth1) since the MAC address has changed (when you answer I Copied It in VMware).
Solution: Tell VMware you copied the machine, so it will chose a unique MAC address. Boot Ubuntu into single user mode (another article on that to follow) then edit the MAC address associated with eth0.
sudo vi /etc/udev/rules.d/70-persistent-net.rules
find the stanza of the network interface in question (NAME=”eth0″) and set the following ATTR tag to the new MAC address:
ATTR{address}=="new-mac-address-here"
Electronic Health Records in Alberta
Thinking of the challenges associated with creating electronic healthcare records for all healthcare users in Alberta. Typical government projects don’t have the best track record for maintaining proper security architecture, much less implementation. Starting to dig into this for my next paper, and I’m somewhat underwhelmed with what I see. Do we have a choice to opt out? Is there any way to ensure our health records don’t get compromised and exposed publicly? I guess I’ll be searching for some answers.
Sifting through Checkpoint FW1 logs
Recently I found myself in the unhappy position of needing to sift through slightly more than a billion Checkpoint Firewall-1 log lines, looking for specific patterns of access. The problem was that many of the exported fwm log files had differing column positions and there had been many ruleset changes over the course of 11 months worth of log data. Many of the excellent FW1 log summarization tools (such as Peter Sundstrom’s fwlogsum) didn’t handle the hundreds of files and differing column positions.
The final scripted solution was processing over 11,000 lines/second .. and still took over 23 hours for the first run.
Log file exports via fwm logexport can have variable column positioning, except for record ID number “num”, which is *always* column number one. I see three viable alternatives to the changing column position in the ASCII log files exported via fwm – so we can automate the log processing:
fwm logexport -i fw1-binary-logfile -o fw1-ascii-logfile.txt -n -p- Parse the header line (line #1) of every log file and dynamically map (rearrange) the columns to a pre-determined standard in memory before further processing (painful, expensive)
- Tell Checkpoint fwm to export in a fixed column ordering
- create
logexport.ini
and place in
$FWDIR/conf directory- eg. fwmgmtsrv:
C:\WINDOWS\FW1\R65\FW1\conf- logexport.ini:
[Fields_Info]

included_fields = num,date,time,orig,origin_id,type,action,alert,i/f_name,

i/f_dir,product,rule,src,dst,proto,service,s_port,xlatesrc,xlatedst,

nat_rulenum,nat_addtnl_rulenum,xlatesport,xlatedport,user,

partner,community,session_id,ipv6_src,ipv6_dst,

srckeyid,dstkeyid,CookieI,CookieR,msgid,elapsed,

bytes,packets,start_time,snid,ua_snid,d_name,id_src,ua_operation,

sso_type_desc,app_name,auth_domain,uname4domain,wa_headers,

result_desc,r_dest,comment,url,redirect_url,enc_desc,e2e_enc_desc,

auth_result,attack,log_sys_message,

rule_uid,rule_name,service_id,resource,reason,cat_server,

dstname,SOAP Method,category,ICMP,message_info,

TCP flags,rpc_prog,Total logs,

Suppressed logs,DCE-RPC Interface UUID,Packet info,

message,ip_id,ip_len,ip_offset,fragments_dropped,during_sec - Use OPSEC LEA tools to extract event log records instead of export via fwm logexport
Once the ASCII log files are available for processing, my fw1logsearch.pl script can be used to find complex patterns of interest. Any matching records found by fw1logsearch will be output with an initial FW1 header line so that fw1logsearch can be used iteratively, to build very complex search criteria. fw1logsearch can also write out a discard file allowing completely negative logic searches resulting in 100% of the input data separated into a match file and a didn’t match file. Some examples of how I’ve used it are shown here:
gunzip -c fwlogs/2009*gz | \

fw1logsearch.pl --allinclude \

-S '10\.1\.1[1359]\.|10\.2\.1[01]\.|192\.168\.2[245]\.' \

-d '10\.1\.1[1359]\.|10\.2\.1[01]\.|192\.168\.2[245]\.' \

-p '^1310$|^1411$|^1812$|^455' | \

fw1logsearch.pl -S '192\.168\.22\.14$|10\.2\.11\.12$' |\

fw1logsearch.pl --allexclude \

-S '^192\.168\.24\.12$' -P '^1310$' --rejectfile 192-168-24-12-port-1310.txt
Line by line:
1. Unzip the compressed ASCII log files, feed them to the first instance of fw1logsearch.pl
2. First fw1logsearch – all conditions must be true for any events to match
Source address must NOT be in any of the following regex ranges:
10.1.11.* 10.1.13.* 10.1.15.* 10.1.19.*
10.2.10.* 10.2.11.*
192.168.22.* 192.168.24.* 192.168.25.*
Destination address must be in one of the same following regex ranges.
Service (destination port) must be one of:
Exactly port: 1310, 1411, 1812, or any port starting with 455
No protocol is specified, so it will match either TCP or UDP
fw1logsearch.pl will output any matching events to stdout, including a FW1 log header line, so the next instance of fw1logsearch.pl continues filtering the result set.
3. The second fw1logsearch.pl specifies Source Address must not be any of the following
192.168.22.14
10.2.11.12
4. The last fw1logsearch.pl excludes port 1310 from 192.168.24.12, and puts all those records into a separate reject file, while writing the other records to stdout.
This script has been used to process over 4 billion records within the project I wrote it for – and precisely found all the use of particular business cases I needed to modify. The result was zero outages and no unintended business interruption.
Basic syntax/help file:
Usage: fw1logsearch.pl
[-a|–incaction|-A|–excaction <action regex>]
[-p|–incservice|-P|–excservice <dst port regex>]
[-b|–incs_port|-B|–excs_port <src port regex>]
[-s|–incsrc|-S|–excsrc <src regex>]
[-d|–incdst|-D|–excdst <dst regex>]
[-o|–incorig|-O|–excorig <fw regex>]
[-r|–incrule|-R|–excrule <rule-number regex>]
[-t|–incproto|-T|–excproto <proto regex>]
[–dnscache <dns-cache-file>]
[–resolveip]
[–allinclude]
[–allexclude]
[–rejectfile <file>]
[–debug <level>]
fw1logsearch.pl will search a fwm logexport text file for regex patterns specified for supported columns (such as service, src, dst, rule, action, proto and orig).
Include and exclude regex matches may be specified on the same line, although they both will include (print) a line or exclude (reject) a line based on single matches. Allinclude or Allexclude must be specified to force a match
only on all specified column regex patterns.
Regex patterns can be enclosed with single quotes to include characters that are special to the shell, such as the ‘or’ (|) operator.
Header will be output only if there are any matching lines.
Example invocations:
$ cat 2008-07-07*txt | \
fw1logsearch.pl \
-p ’53|domain’ \
-d ‘192.168.1.2|host1|10.10.1.2|host2’ \
-o ‘192.168.2.3|10.10.2.4|10.10.4.5’ \
-S ‘64.65.66.67|32.33.34.35|10.10.*|192.168.*’ \
–resolveip
Will require destination port (service) to be 53, destination IP to be any of 192.168.1.2, host1, 10.10.1.2, or host2 the reporting firewall (origin) to be any of 192.168.2.3, 10.10.2.4, or 10.10.4.5 and the source IP must not be
any of 64.65.66.67, 32.33.34.35, 10.10.*, or 192.168.* Any lines that match this criteria, will display and the orig, src, and dst columns will use the default DNS cache file (dynamically built/managed) to perform name resolution, replacing the IP addresses where possible.
Include regex patterns:
-a –incaction Rule action (accept, deny)
-b –incs_port Source port (s_port)
-p –incservice Destination port (service)
-s –incsrc Source IP|hostname
-d –incdst Destination IP|hostname
-o –incorig Reporting FW IP|hostname
-r –incrule Rule number that triggered entry
-t –incproto Protocol of connection
Exclude regex patterns:
-A –excaction Rule action (accept, deny)
-B –excs_port Source port (s_port)
-P –excservice Destination port (service)
-S –excsrc Source IP|hostname
-D –excdst Destination IP|hostname
-O –excorig Reporting FW IP|hostname
-R –excrule Rule number that triggered entry
-T –excproto Protocol of connection
Other options:
–debug {level} Turn on debugging
–dnscache Specify location of DNS cache file to be used with
the Resolve IPs option
–resolveip Resolve IPs for orig, src, and dst columns AFTER filtering
–rejectfile Write out all rejected lines to a specified file
Download fw1logsearch.pl
Mac OS X Command Line notes
Encrypted Filesystems with Sparse Bundles
Mac OS X offers encrypted filesystems through sparse bundles. To mount up a sparse bundle, given the password used to create the bundle, use the hdiutil:
hdiutil attach -verbose -readonly /path/to/sparse.bundle.directory
This will mount up the sparse bundle located at the directory path specified. To unmount the sparse bundle, use:
hdiutil detach /Volume/sparse.bundle.name
Adding entries to /etc/hosts
Although simply editing /etc/hosts should work, there are times where the new entries may not be recognized, in these cases the OS X name cache daemon needs to be kicked:
dscacheutil -flushcache
Mac OS X Hostnames
Although you can change the hostname of your Mac OS X device through the System Control Panel -> Sharing, the following command line can lock the name so DHCP and other dynamic networking protocols don’t mess up your hostname (from RichardBronosky):
sudo hostname my-permanent-name
sudo scutil –set LocalHostName $(hostname)
sudo scutil –set HostName $(hostname)
Handy Command Lines
Command line short cuts:
pmset -g batt Show battery status
launchctl unload /System/Library/LaunchDaemons/com.apple.syslogd.plist; sleep 1; launchctl load /System/Library/LaunchDaemons/com.apple.syslogd.plist Reload syslog daemon
SHA Hash on Mac OS X
Mac OS X doesn’t have sha256sum, but does have openssl, so the following can compute a SHA256 hash:
openssl dgst -sha256 Fedora-17-x86_64-DVD.iso